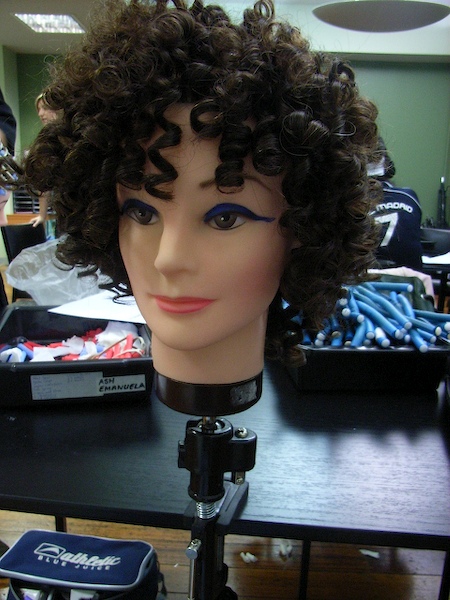
FIMO NAIL ART


my new fimo fruits


cool summer nail art

my Nail Of The Day... new fruit design
I used sally hansen nailgrowth miracle sally hansen hard as nails # 4 vanilla bean sally hansen hard as nails # 26 peach daiquiri and two way nail art pen for glitter tip.....

YUMMY NAIL ART


thumb - chocolate donut
index - jolly hotdog
middle - yummy burger
ring - overload pizza
pinky - hotdog with cheese

LEOPARD


leopard close up details


my c-curved nail shape...


My own version of freehand LEOPARD
hope you like 'em...

TULIP

MY FREEHAND TULIP
base coat: sassy colors fire opal nail polish
two way nail art pen yellow, red, and gold
top coat: arezia gold glitz


hope you like it! God Bless

FRANKENSTEIN VS WITCH

My client came in today and said I could do whatever I wanted on her nails so this is what happened! I used acrylic in nebula, lime rind, and purple passion. I alternated different colors on the nails and tips. I also used a frankenstein and witch fimo clay from kennickkreations.com. Of course I had to add a few dots here and there. HAPPY HAUNTING!


These nails are done with northern lights and then I used purple passion acrylic at the smile line and faded it up into the white. I used clay witches on the ring fingers from none other than kennickkreations.com.

AMISY


TOTD peace!!
amisy blue, yellow, red and green

JACK O'LANTERN NAILS

These are acrylic nails in nebula black with ezflow candy corn orange at the tip. I added fimo clay jack o'lanterns from kennickkreations.com on the ring fingers. My client was feeling wild today so we went even further and added black and orange dots with polish at the smile line.

BOO!

These nails have a fimo clay BOO! on the ring fingers. I painted black tiger stripes at an angle on all of the nails.

CORN

Step 1:
Apply 2 coats of yellow base coat polish.
In my case, I used Amisy yellow nail polish. Let dry....

Step 2:
Apply something green, whatever green nail polish you like...
I used Amisy green polish...

Step 3:
Apply green nail polish at the right and left side of your nail....

here's how it will look...
I used tiny glittery top coat for this one..

use dotting tool for corn details.


finished corn nail art ... =)


details

thanks for viewing.. God Bless

CHECKERED


My checkered TOTD, freehand....
I did this nail art a year ago... hehehe
with chunky checkered ring...
i made it... ohh soo emo!!! XD

Contact Me / Disclaimer

This is a personal blog hosted, maintained and updated by me. If you have any question about this blog please feel free to send me an e-mail thru mae_espiritu@yahoo.com. All designs and photos posted are property of the owner unless otherwise stated. Illegal usage of posted pictures, and copying without my permission is strictly prohibited. Please respect my rights as the blog owner as you would like others to respect yours.
Thank you very much.
Mae Espiritu Of ART OF NAIL

PHILIPPINE FLAG

Hi to all nail art enthusiasts!!! Here's my first blogpost..
I don't know how to start so I decided to show
one of my first mani I made..
Philippine Flag Nail Art

First, apply white base coat
(you can choose any white nail polish you want)
Second, apply blue nail polish on the left side.
Third, apply red nail polish on the right side using a dotting tool or toothpick for the sun and star design......
Apply top coat and let it dry..

Black Lace Manicure

Recently i have been crazy about black,white and orange nail colors. Is it a good sign?
I really enjoy this look, i think it is gentle and stylish. I again was inspired my Boudoir collection from CC.I mean, seriously, just look at those gems - aren't they stunning? And i really love that even with the top coat over it, they are still super sparkly. Again, it is a little piece of mirror in every gem.


Right Hand

HALLOWEEN

It's time for Halloween nails! I added acrylic in candy corn by ezflow at the smile line. On the ring finger there is a fimo clay spider from kennickkreations.com. I also added black tiger stripes at an angle with a striping brush. Happy Halloween!

AUTUMN

I used two colors of acrylic here in purple spinel and plum loco. I added fimo clay leaves that I purchased from kennickkreations.com. I also added dots with polish.

Flakes

Just some random polish pictures.
Flakes polishes are gorgeous and this one delivers really deep and awesome Halloweenish look. This is quit rare that i decide go without design on the nails, but this polish is design itself


Matted with Essie Mate top coat

Spiral Perm Hairstyles


2009, 2010 Spiral Perm Hairstyles


Spiral perms were all the rage back in the 1980’s. Today they are making a comeback and if they are done correctly, a spiral pem can be truly beautiful. A badly done spiral perm will leave you looking like you just stuck your finger in a light socket, so make sure you go to a reputable stylist. Spiral perms make a woman look saucy, flirty, and extremely sexy.
The name spiral comes from how the hair is permed. Traditional perms use small rollers and your hair is rolled horizontally. A spiral perm uses long, slender rollers and your hair is rolled vertically, from the ends to your scalp, in a corkscrew fashion, hence the name “spiral”. Depending on the size of the vertical roller, your curls can be loose or extremely tight. You are not limited to always having one particular curly hairstyle when you get a spiral perm. Use a hairdryer with a diffuser to dry your curly hair and one without if you want to blow-dry it straight. Straightening your hair with a hairdryer will leave it appearing thicker and full of body; your curls will come right back when you wash your hair again. You can even use the diffuser for a little bit longer than it takes to dry your hair to change your hairstyle into attractive waves. Add some hair gel and you can scrunch your hair into even tighter ringlets for yet another look.
Spiral perms can cost almost twice as much as a regular perm. This is because they look best on longer hair and require more work. You could try giving yourself a spiral perm but you run the risk of a frizzy perm, and since spiral perms last months longer than a normal perm, you may not want to risk that. Also, remember to be careful after you get your spiral perm – use lots of conditioning products (perms dry out hair) and avoid any hair products that have alcohol in them. Alcohol will make the drying much worse. And if your hair is not in good condition, stay away from any type of perm or you’ll look like a dust bunny rather than a sexy woman.
Photo by Ikue

"Good Bye Summer" nail art contest!

OMG! All the nails are super beautiful, you must come and vote! just click HERE
My nails are number 9 :) Unfortunately Jamie scaled pictures, so my nails are kind of small where, but here are some other bigger pictures of my entry .The idea behind this manicure is a change of season, because for this super worm summer look, i used polishes from fall and winter collections(orange and red glitter)
Anyway this is super tough to wait for results till Wednesday.


Alternative "GoodBye Summer' manicure

I am super excited because tomorrow Jamie from Nail-art Tuesday will pronounce her contest results. I just cant wait to see other entries besides mine. I also encourage everybody to come visit her blog tomorrow, because one of the winners will be readers choice. So you can vote for entries where starting tomorrow.
I sure encourage you to vote for my entry lol. But it is really up to you, vote for the one you like the most.
My contest entry will not be reviled until tomorrow, but today i am posting my alternative manicure that i made for contest ,but it nether been submitted.


DOT TREND

This is my client that started the whole dot trend. These nails are done with acrylic in polar bear. I added fimo clay dots that I purchased from oaktreedollhouseminiatures.com. I just love these dots. I would love to do a set with orange and black for halloween. I can't wait for Halloween nails!

PURPLE SMILEY

These are acrylic nails I used acrylic in northern lights and added purple passion at the smile line. On the ring fingers I added smiley faces made of fimo clay and added purple passion acrylic at the tip. Last but not least I added white dots with polish. Don't worry be happy!

Megan Fox Hair Color


Megan Fox Hair Color - Fall, Winter 2010 Edition


The bombshell Megan Fox has captured the hearts of men and women worldwide. Some love her for her acting, some for her modeling, and women love her hair. She always has a beautiful style and unique color. Here is how to get this beauty’s hair color for yourself.
If you already have black hair, lucky you – you and Megan have the same natural color. If you naturally have very dark brown hair, you could probably manage to get this look without needing to dye it black. To get the perfect color, you should have black hair. Be aware that for those with really fair skin the contrast between your new black hair and your skin can be startling; some people end up hating that look. If you dye your hair black, you either will have to wait for it to turn back to your natural color or get it bleached, which will damage your hair badly. Start by dyeing your hair black. Your own natural highlights will help bring out highlights in the black hair color. If your hair is naturally dark, you can just start highlighting. If you want to copy Megan’s look exactly, then add some dark brown highlights and some medium brown lowlights. Chestnut brown would be a good color for this. Another way you could achieve this look is by dyeing your hair black, then dye it again with a dark brown. If you choose this method, make sure to condition your hair since dyeing it could damage it. But you’ll have that same sexy look either way.
Photo/PR PHOTOS